A clever hack for filling the water tank
We didn't invent this hack. We learned about it from a solo boater (from Leicester I think), at a water point in Milton Keynes. Most boaters will know this is a lot easier with two people, one to hold the hose into the tank, and one to operate the tap ashore (and perhaps lay out the hose). The simple device which he showed us, made from copper pipe and a few pipe fittings, enables one person to do the job from start to finish, easily, and even with two people it is easier, because you don't need to hold the hose - which is very tedious at a slow tap. I made up a version of it and we have used it ever since. I don't know what to call it, so 'gadget' will have to do.
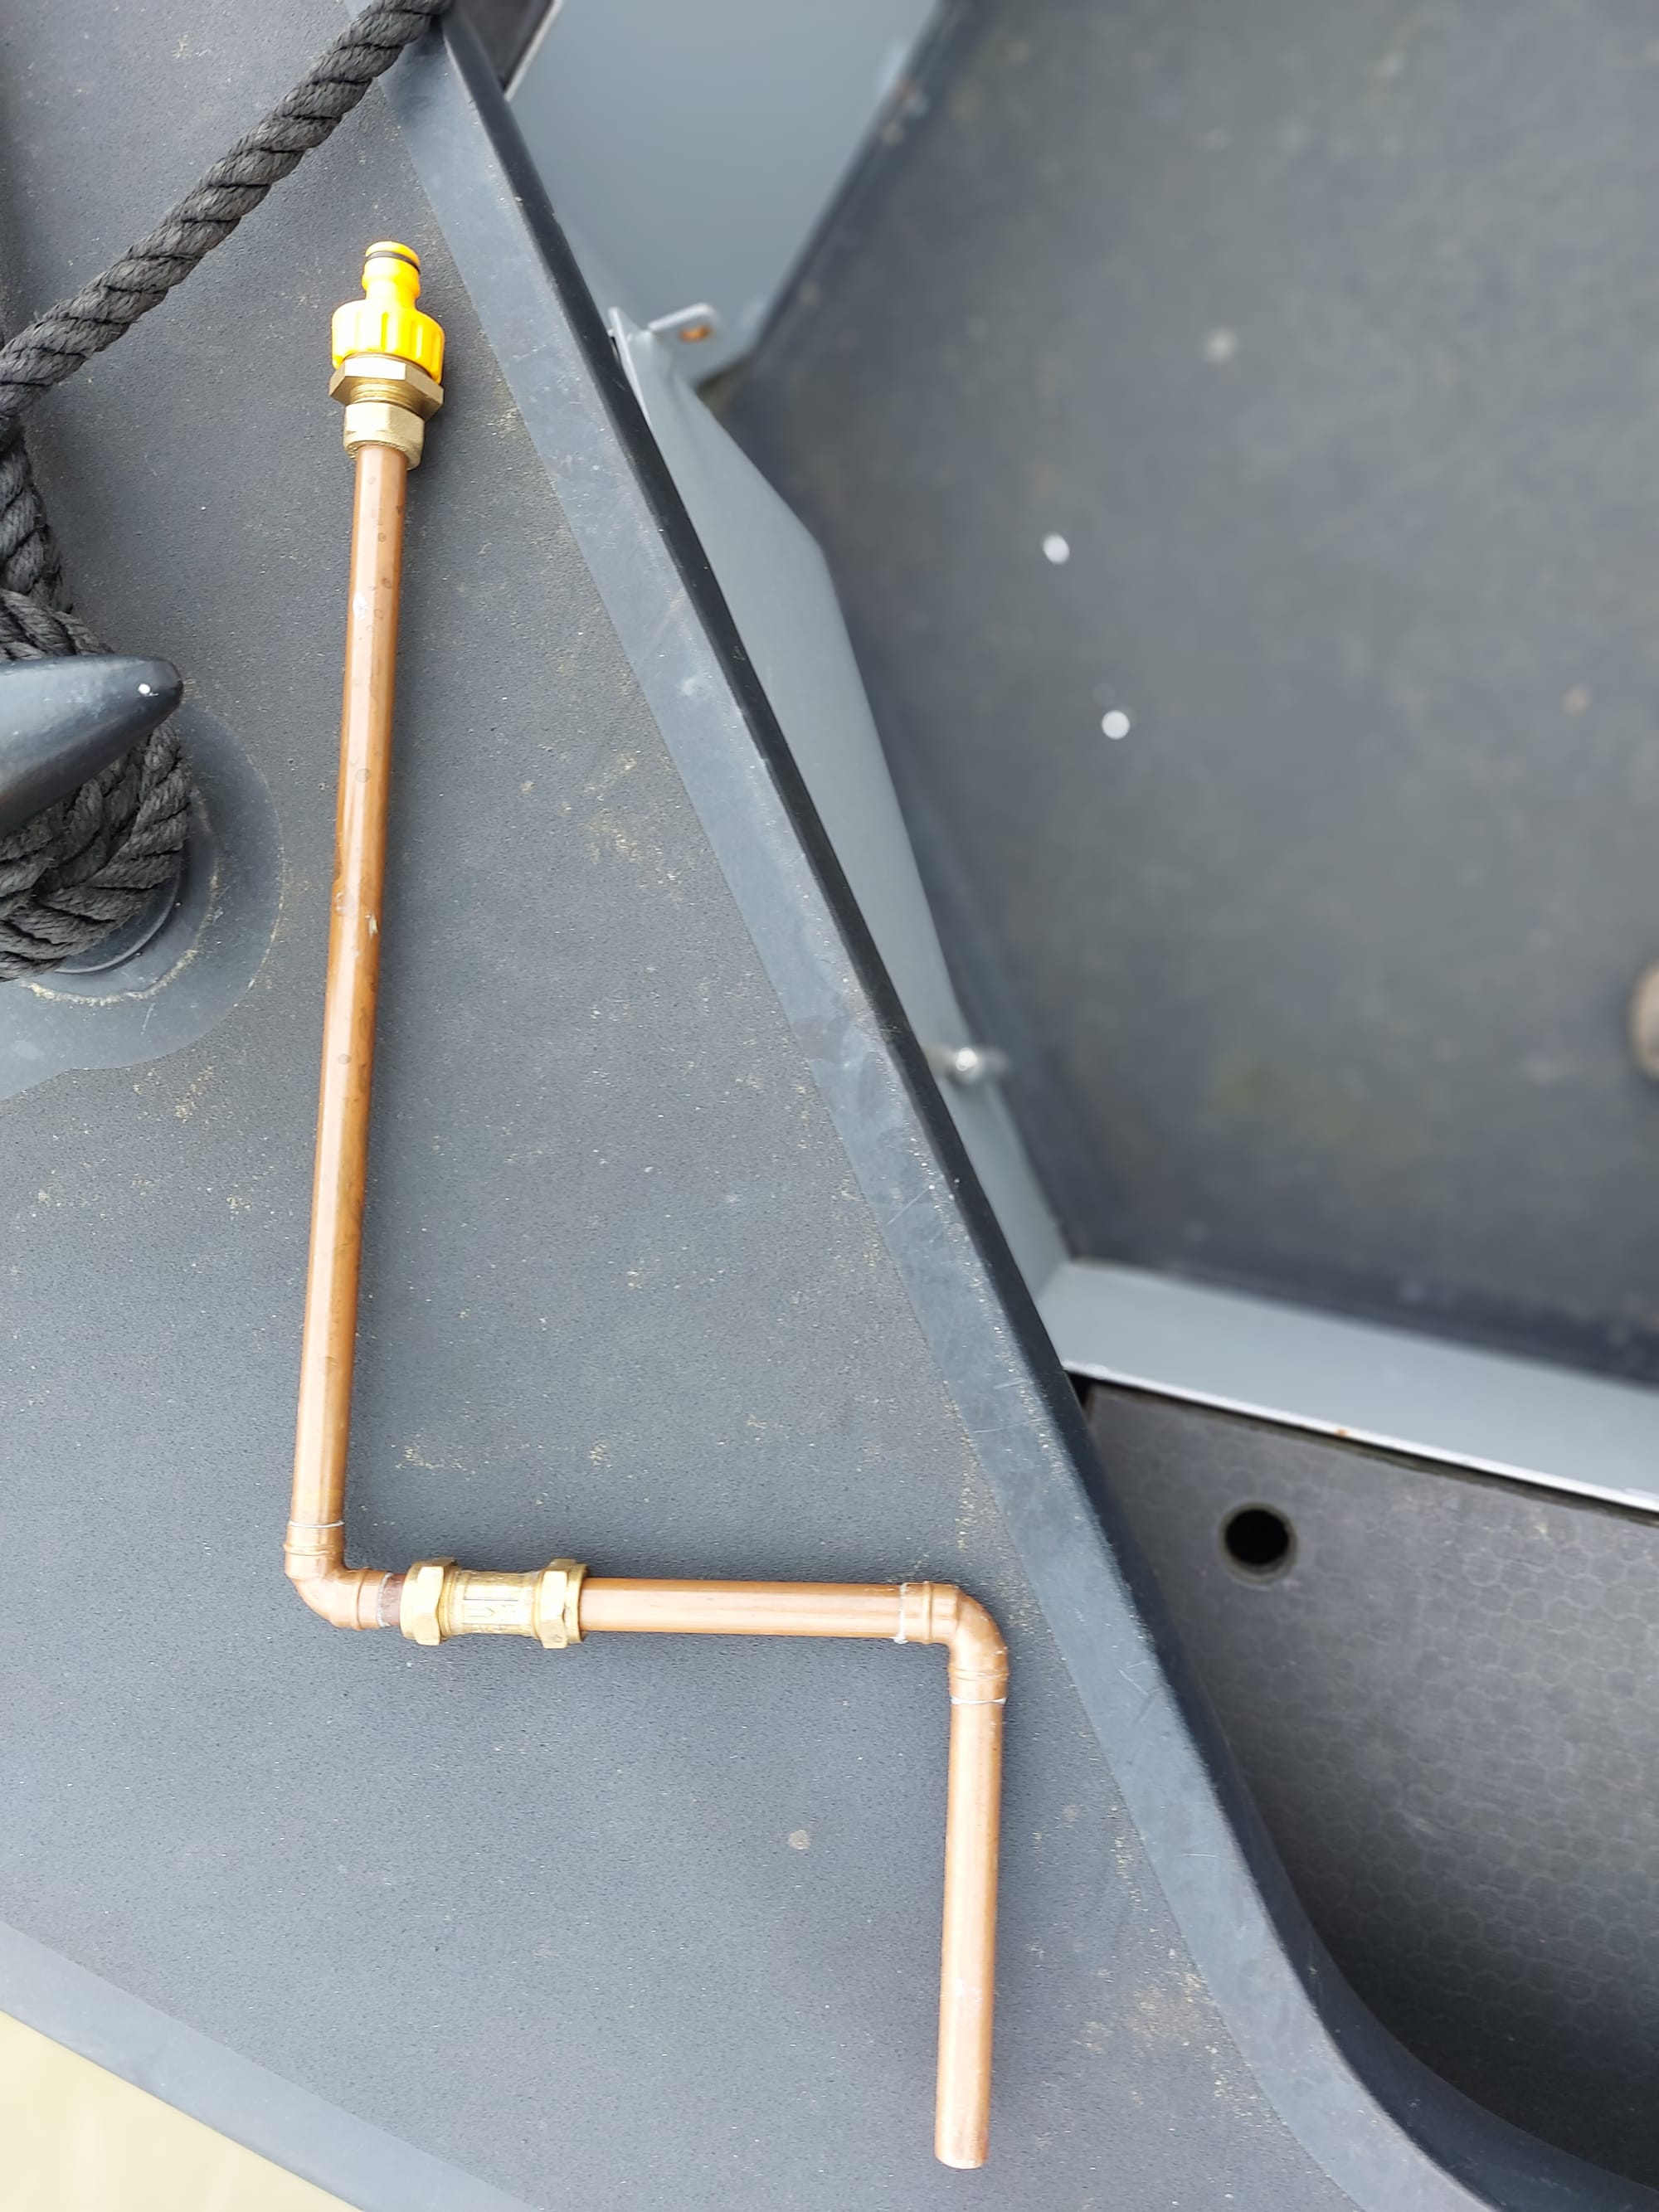
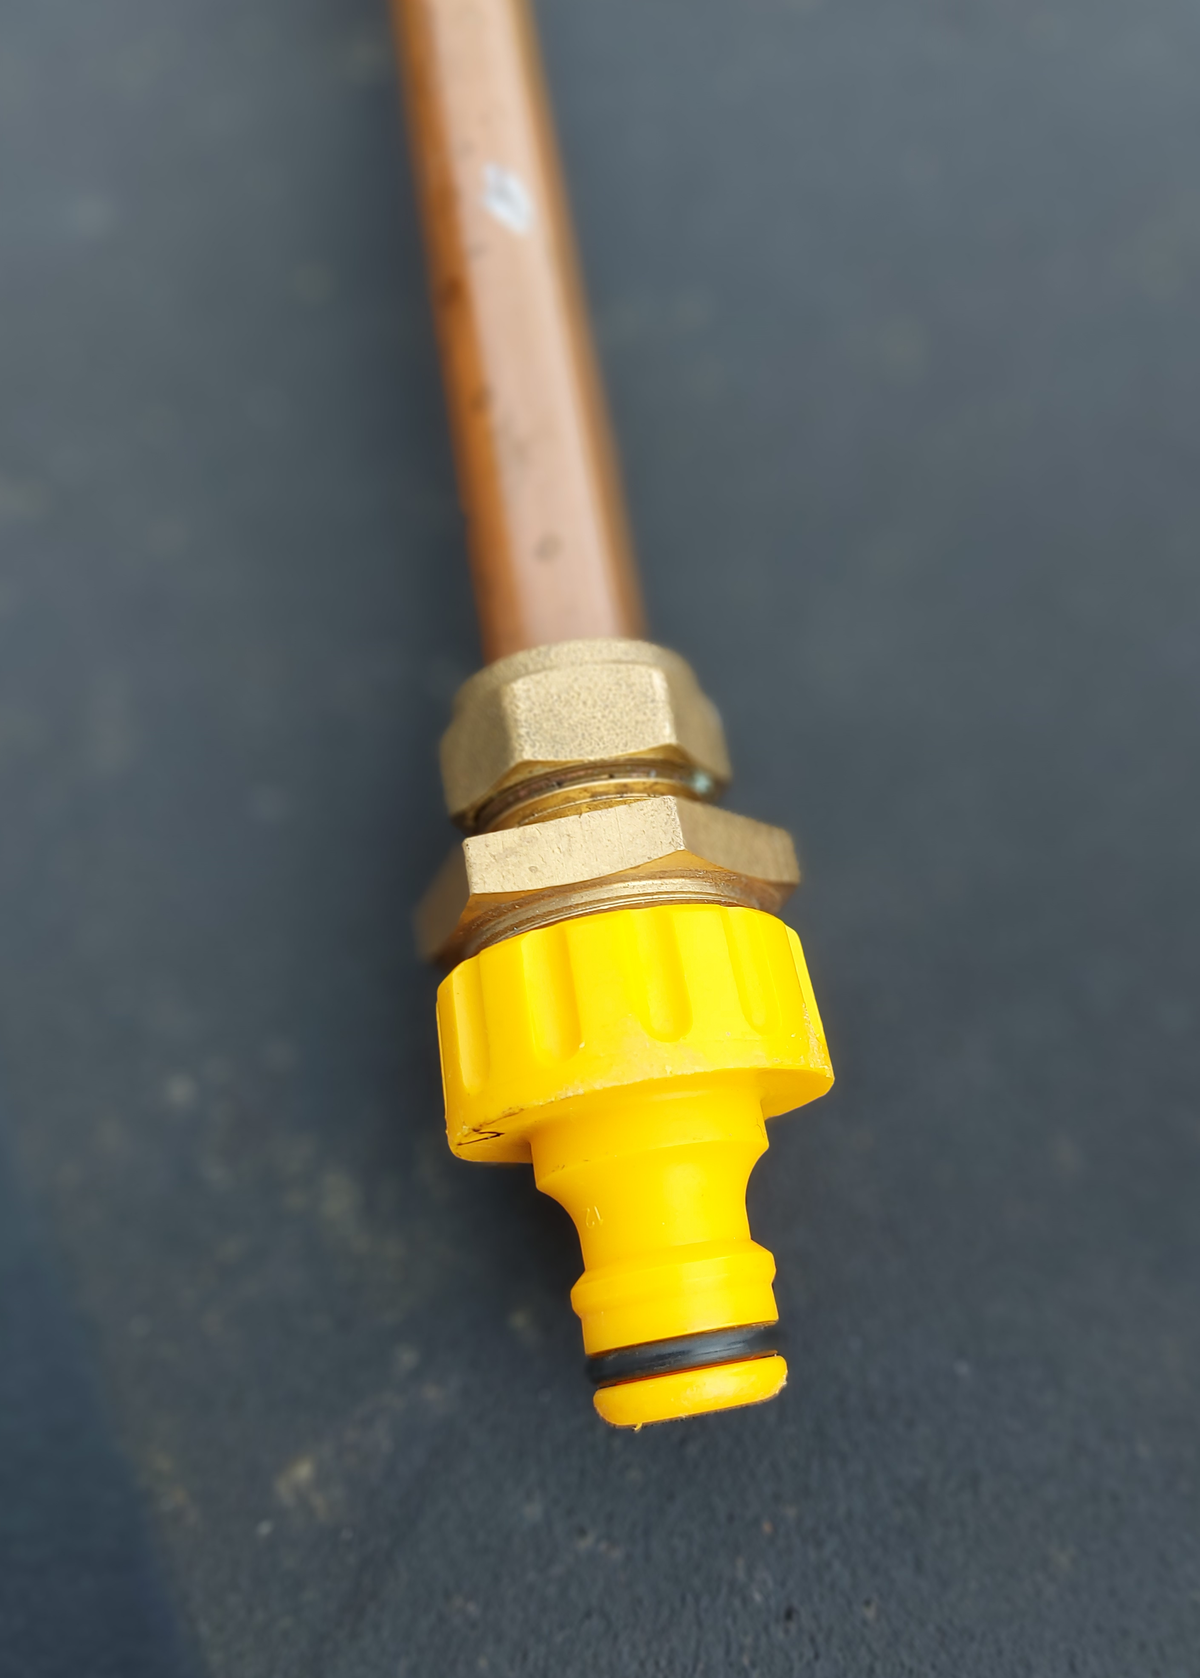
The gadget is made from 15mm copper tube, a couple of elbows and a 3/4 inch BSP male coupler (to attach a Hozelock or similar fitting to, for connecting the hose end). There is a non-return valve between the two bends (maybe not necessary, but the one we were shown in Milton Keynes had this too). I used soldered elbows, but you could make it up with compression fittings instead.
The dogleg at the end allows two things: first, hooking the device over the side of the boat (e.g. through a fairlead) where it will stay while you flush the hose through; second, allowing the pipe to stand in the filling hole by putting the short end into the hole. The pictures show this to make it clearer, it is very simple to do.
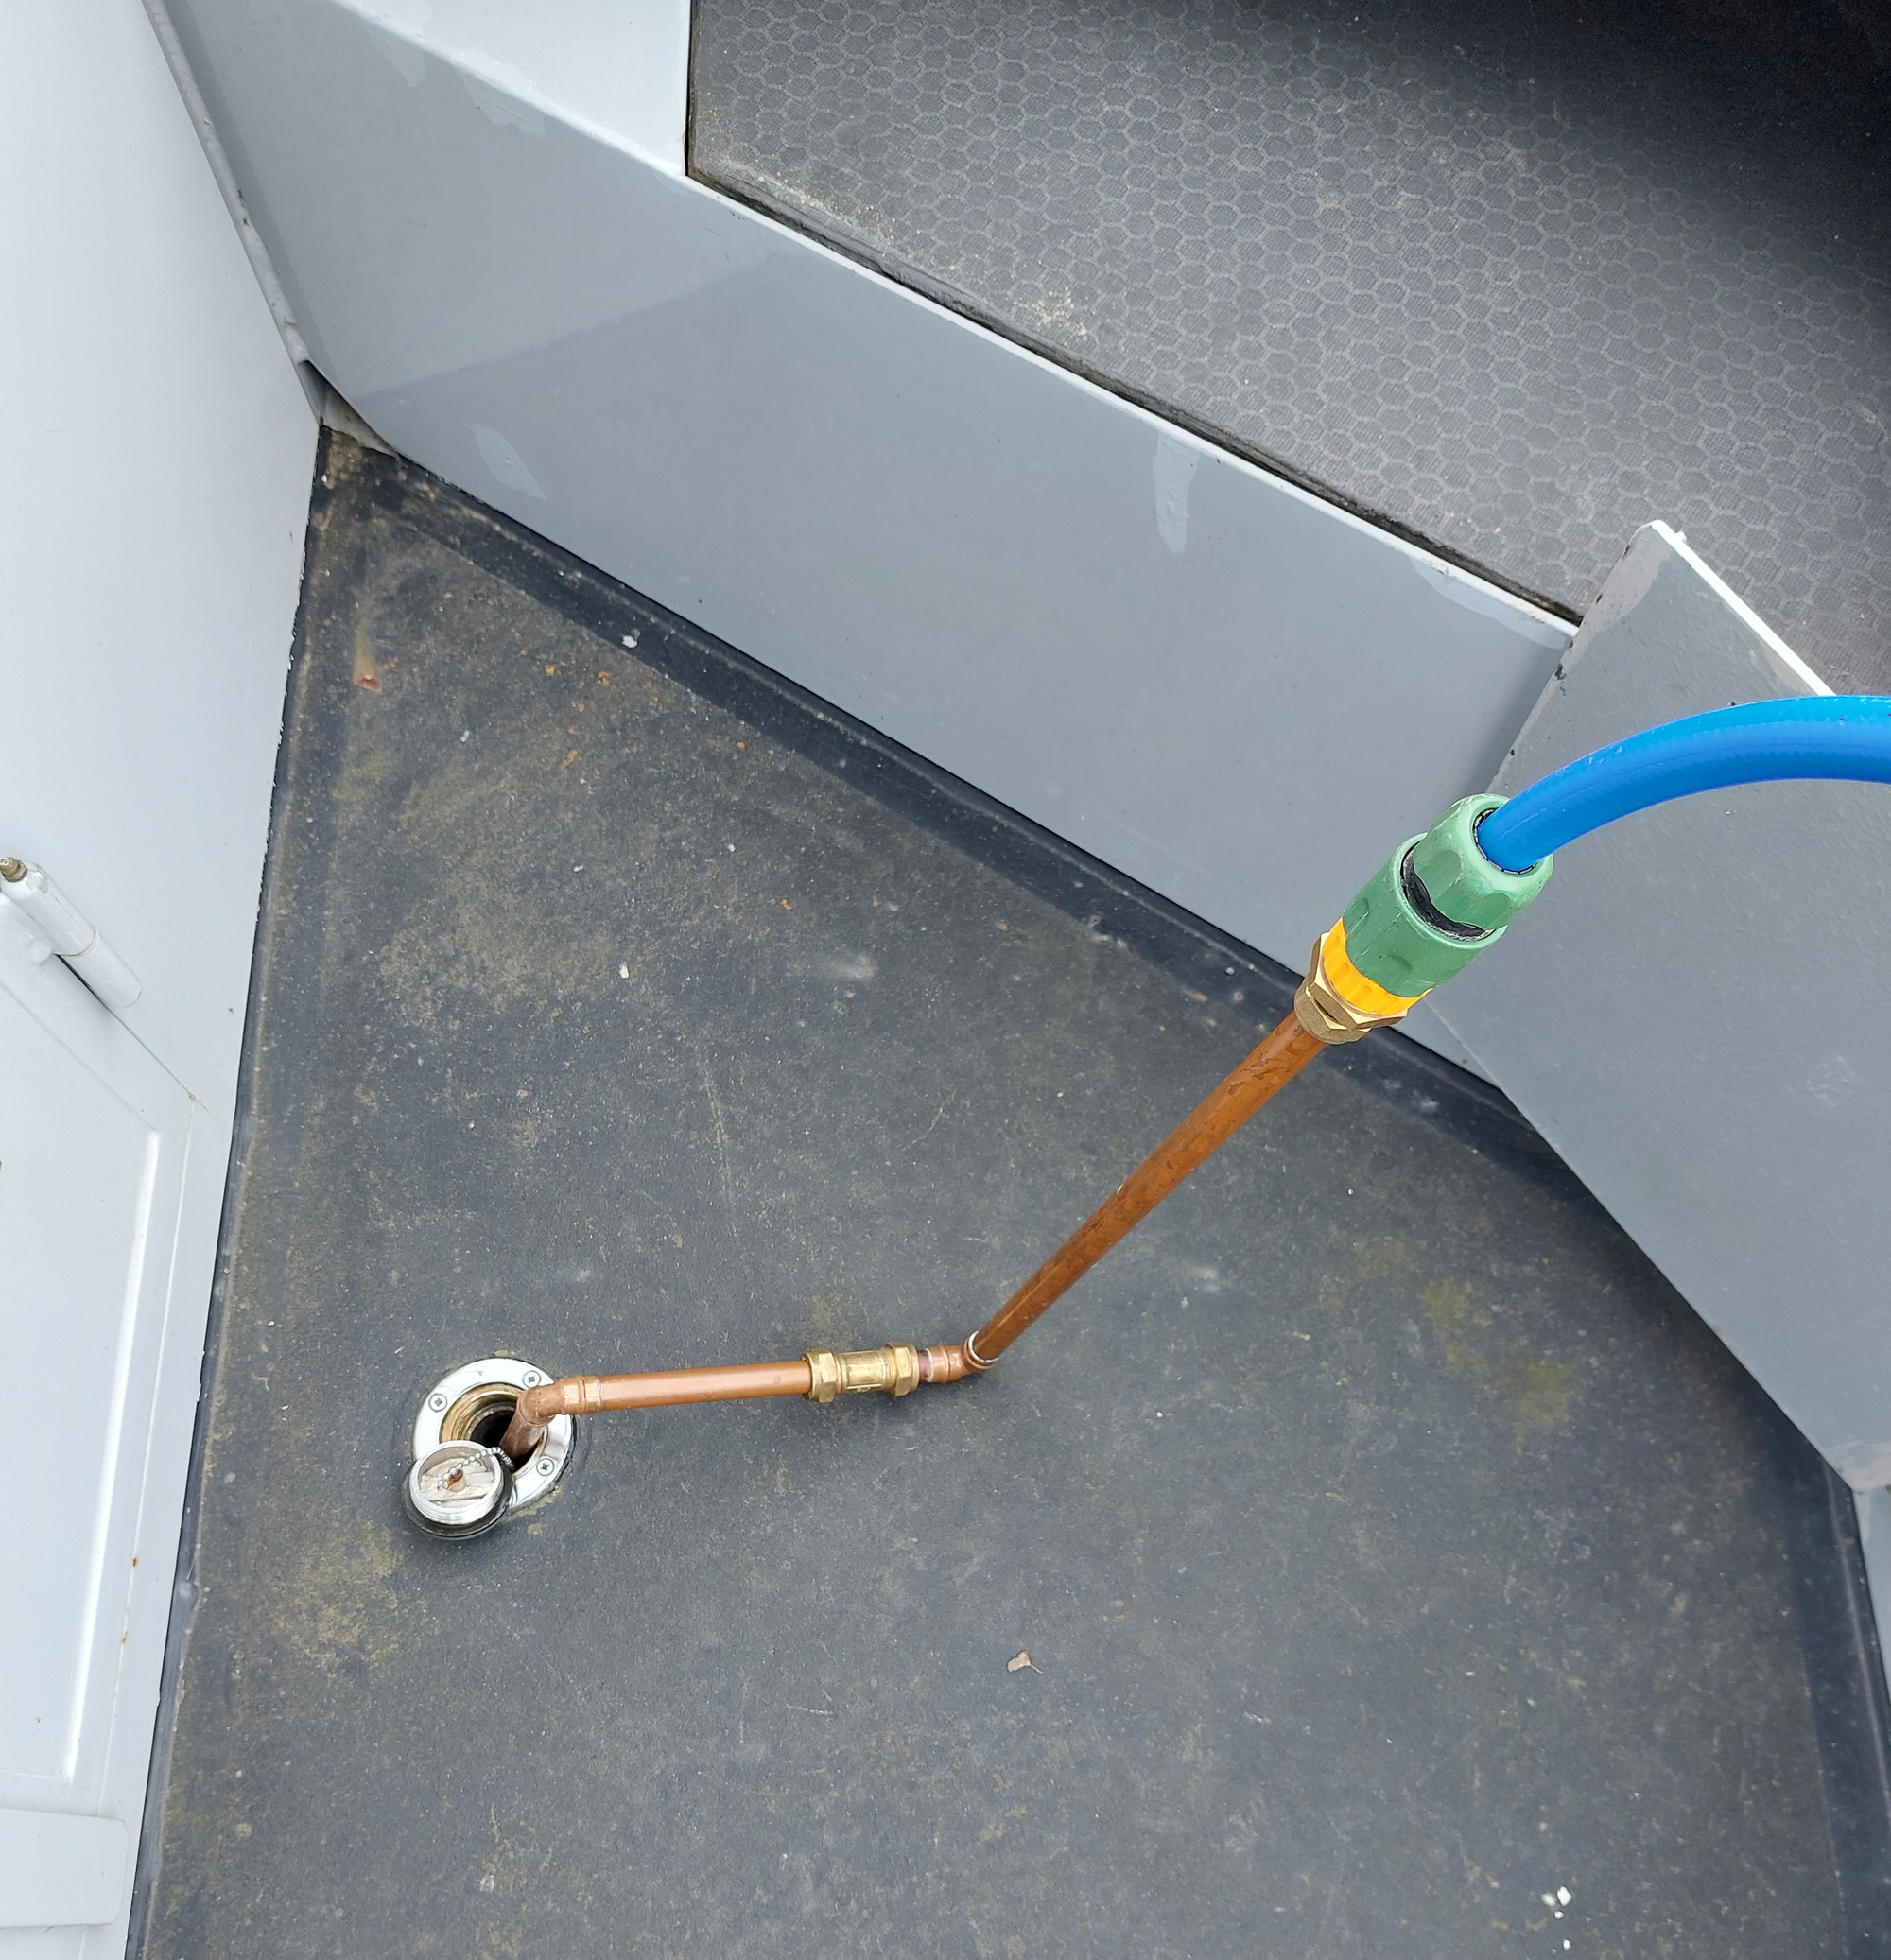
So the solo procedure is this: lay out your hose from the tap to the boat, attach the hose end to the gadget, and hook it over the side. Go back to the tap and turn on, run enough water through to flush the hose and the copper pipe. Turn the tap off, go back to the gadget, unhook it from the side of the boat, and poke the end into the filler hole. The gadget will fall sideways slightly until it is wedged in the hole. Go back to the tap and turn on. You can then either listen for overflow, or stand by the filler hole and pull the gadget out when the tank is full, hooking it over the side again while you go back to the tap and turn it off, roll up the hose and drain it, and put everything away again.
I've done this process in a marina when the tap is near the stern of the boat (our tank is in the bow). Walking back and forth along the length of the boat is necessary between steps, but if you imagine this while re-reading the description above, you'll see that it is quite relaxed. Either water is flowing over the side of the boat into the marina or into the tank, or the water isn't flowing. You don't have to rush, so even in the rain, when you may be walking on slippery surfaces, not having to rush makes the process stress-free.
A second benefit to the device is that you don't have to poke your hose end into the tank filler and risk dirt getting into the tank. Only the end of the gadget goes in the filler hole, and it's easy to wipe clean, or rinse under the tap before you start.
Incidentally our hose is in two lengths, one longer than the other. Both lengths have Hozelock couplers at both ends. If we need all of the hose, we join the two lengths with a double-ended male coupler. Our bow locker isn't big enough to hold a reel, so we just coil the hose and bind each length with 3 releasable cable ties. These coiled lengths then stow away easily and neatly, and they stay coiled in the locker without tangling. The hose itself is blue food grade hose bought from a camping and caravanning shop by the metre. Now and then I clean the inside of the hose with Milton solution by fastening the two ends of each length to the stern rail with releasable cable ties, open ends upwards. Then I can fill the hose through a small funnel with the solution until it appears at the other end, and leave it for 15 minutes, before emptying out.
Updated 1 April 2026 to correct the size of the BSP male fitting on the end of the gadget (previously said 1/2 inch BSP, which is incorrect, the thread size needs to be the same as most canal-side taps, in order to accept a Hozelock adaptor).