Why there is a Raspberry Pi on our boat, and what it does
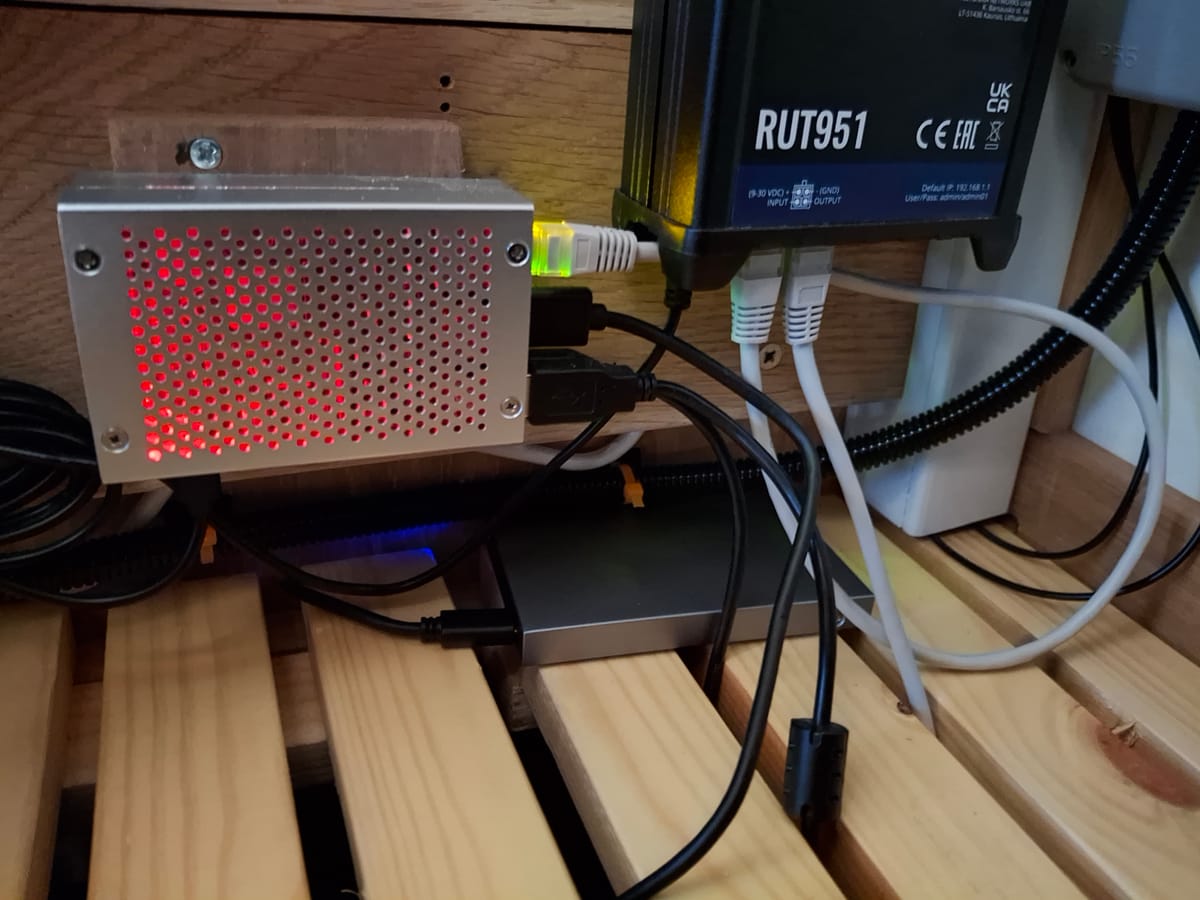
A computer installed on a boat allows remote monitoring and more. Four Dimensions has an installed Raspberry Pi 4B computer connected to the boat's cellular Internet router (which I wrote about in an earlier post). The Raspberry Pi is a range of small single-board computers about the size of a credit card. The 4B on the boat is a powerful computer that easily runs Ubuntu Linux, the same operating system that I run on my laptop. Unlike the laptop, the Raspberry Pi 4B on the boat has no display screen, and no keyboard. So what can it do? A lot, as I will explain.
Firstly, as I discussed in the earlier post about our Teltonika cellular Internet router, the Raspberry Pi 4B takes very little power to run. That's important, because it runs 24 hours a day, every day of the year, even when the boat is moored and the only power source is the solar panel. The router and the Pi 4 together take about 9 watts (a total daily energy consumption of around 230Wh, or just under a quarter of an electricity 'unit', 1kWh, as measured by the solar panel controller, so that 9W includes the power needed to run the solar panel controller, and losses due to heat in the battery charging process). 9W doesn't significantly drain the batteries during the hours of darkness, and the solar panel easily restores the batteries to 100% during the morning. (From January until March the boat is on shoreline power in order to run greenhouse heaters on a thermostat, so even if the solar panel was covered with snow, there would be no problem, as the shoreline keeps the batteries charged 24 hours a day.)
How do you operate a computer with no display screen and keyboard? You connect to it from a laptop or desktop computer and use a command line interface (CLI). This is how most of the computers in the world are operated - the server computers in data centres that run websites, for example. A command line interface means you type commands, and the computer responds with typed output, in a terminal window. I only need to do this when I am installing updates, or making changes, or testing new code. Most of the time the computer just runs on its own without any input from me.
So what exactly is the Raspberry Pi 4B doing all day? Mostly idling, because what it does for me doesn't take much of its processor power. The Pi4 cost around £65. You could buy a cheaper single-board computer, but the convenience of running Ubuntu Linux, plus the multiple USB ports, and an Ethernet port, makes the Pi4 a much more appealing choice. Here's an overview of what it does:
- It monitors the environment inside the boat, by receiving data on temperature and humidity from Zigbee sensors around the boat. If these exceed limits that I've set, the computer tells me (by SMS) - alerting me to damp, which might indicate water getting into the boat, or to freezing conditions in winter.
- It monitors security - the front and rear doors and the side hatch are fitted with Zigbee magnetic contact sensors, and there are motion sensors inside the boat too. If anything is detected, the computer tells me.
- It sends me a daily summary (by email) of the environment and security data, the state of the computer (whether there are any updates available), and a summary of the inverter/battery/solar data for the day, so that I know that everything is running normally. Obviously this isn't necessary when we are on board, but when we're not it is invaluable for peace of mind.
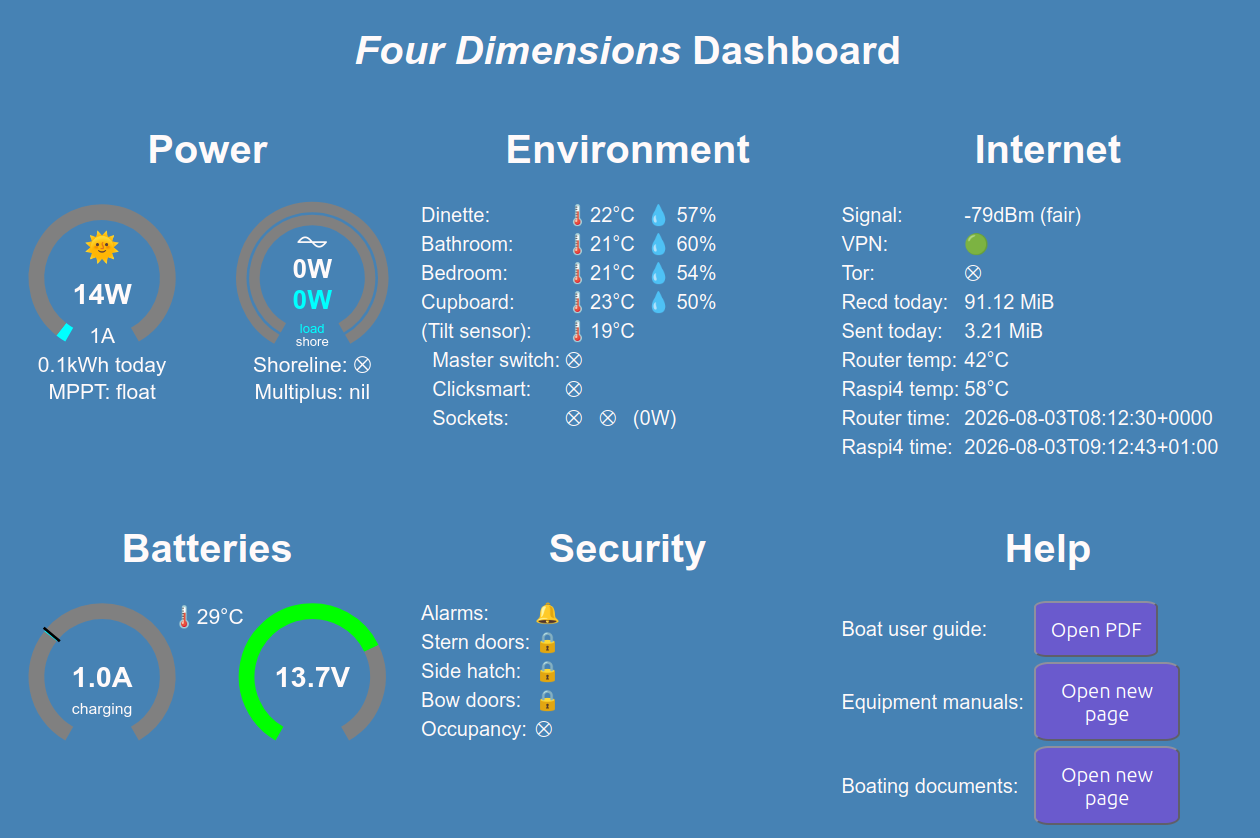
- It runs a dashboard (more later) that allows me to see graphically what is happening on board, including the power being delivered by the solar panel, the power being taken from the batteries and the shoreline if connected, whether the shoreline power is live or dead, the signal strength reported by the cellular router, and the environment and security status. This dashboard can be accessed over the boat wifi or Ethernet using any web browser, or remotely over a Wireguard Virtual Private Network which I operate. I can access it on my phone (Android has a Wireguard app which allows the phone to connect to a Wireguard VPN - only if you have the credentials of course). Although the dashboard is just a webpage served by a simple webserver, it isn't on the public Internet, it's on a private Intranet, accessible over the VPN from anywhere on the Internet.
- When we're on board, the Raspberry Pi 4 can run a heated cupboard for drying clothes. This is gently heated by two 230V small tubular heaters powered from the solar panel, or the domestic alternator if the engine is running. The Pi 4 runs a software control loop that turns the heaters off if the cupboard reaches a set temperature, or if there isn't enough solar, and it warns me if the engine is off and solar power falls below the level at which the heaters can be run. If we're on shoreline power, it turns off the heaters if the shoreline power is cut off. Control of the heaters is achieved through a Clicksmart Zigbee double mains socket, which I fitted in place of a normal double socket which was already in the cupboard. The warm cupboard is tremendously useful and means that our towels and flannels are dried ready for their next use, and damp coats can be dried, using solar power that would otherwise be unused (this is called a 'solar dump' I believe).
- It backs up the software and data on the Raspberry Pi, to a remote server in a data centre which I rent for a very low price. From there I can download the backups from time to time to my laptop.
So that's what the Raspberry Pi does, and why it's on the boat. As with other stuff I've written about, I haven't invented all this myself. Ideas came from elsewhere, including a useful chat I had early on with a chap who had done something similar on his boat. He gave me the idea of the Zigbee sensors. A lot else I discovered in the usual way, by searching on the Internet.
Technical details
For those who are interested, some technical detail follows. I'm not going to explain everything, but I'll mention the names of important bits and pieces that would enable readers to look up the details elsewhere.
The Raspberry Pi4 is powered by a DC-to-DC converter running off the boat 12V supply. The output of the converter is 5V at 3A (15W maximum). These converters are readily available online, fully sealed, with a USB-C output cable permanently attached which plugs straight into the Pi4 power port. I plan to upgrade the converter to 5A, to enable me to power a USB loudspeaker for making spoken announcements inside the boat (warnings mainly, that currently reach me only by SMS).
Originally, the Ubuntu Linux operating system was stored on an SD card, but this was very tedious to backup, and I later discovered Western Digital's Green range of solid-state hard drives (SSDs) (now no longer manufactured, the Blue drives are likely the best alternative). These are low power SSDs, and I mounted mine inside a USB-C enclosure which enables me to connect it to the Pi4 by USB. This makes disconnecting it easy when I want to make an image backup on my laptop (I shut down the Pi4 first). I use the Linux dd command to make a byte-for-byte backup of the partition that Ubuntu is running from. Copying the data from the SSD to the laptop is much faster than copying an SD card. And plugging the SSD back in is way easier than plugging an SD card in. The SSD has a capacity of 240GB, which is massively more than I need, but it was only about £35.
I use SSH to connect to the Pi4 from my laptop, whether I'm on the boat or not. In the latter case I connect over a Wireguard VPN, which depends on a very low cost server in a data centre to provide the public Internet address that Wireguard needs. I use a public/private key pair to authenticate with SSH, and Wireguard uses similar. The data is encrypted twice (once would do) but that doesn't cause any noticeable lag. Before I used Wireguard, I used to connect over Tor, and that is still available as a fallback. It does have lag, but it works, and it doesn't require a public Internet address anywhere (both ends must connect to the Tor network with an outgoing connection). I tell the Pi4 to connect to Tor by sending an SMS message, as the connection to Tor needs to come from the Pi4, as it doesn't have a public Internet address (this makes it more secure of course).
Custom software is mostly written in Ruby, with some bash scripts for simple tasks like daily email reports. I had not used Ruby until I started on this project, and it was some Teltonika documentation about the router that set me on the path to Ruby, but it was a great discovery, ideal for this sort of coding. There are multiple Ruby scripts, each running a loop under the control of systemd. One of these is the cupboard heater control loop, another reads the Zigbee sensors from Zigbee2MQTT which is what I use to access Zigbee sensors from Linux, and another reads data from the Victron solar controller and the inverter using Bluetooth. Yet another processes the data, and writes it to CSV files, sending me an alert if anything is out of limits. Data is shared between the scripts using a tmpfs file system (a.k.a RAMdisk), with a simple Ruby method to perform atomic write of each data variable (in JSON format). It may seem daft to store each individual variable in a file, but there is way more RAM on the Pi4 than I need, and tmpfs works fast, and above all, already exists and is simple to use because writing to and reading from files is built into any programming/scripting language including Ruby. The tmpfs file system uses 336KB of RAM, out of 4GB on the Pi4 more than half of which is not used (room for expansion then!).
Linux provides many other useful tools that I use to run the system. I explained to my wife that this is a sort of software 'Meccano', and it is. You bolt things together from existing bits and pieces that Linux provides. Emails are sent using MSMTP, mostly from bash scripts, but also from Ruby. I use a dedicated email account for these emails, which costs me nothing, as my email provider offers more email accounts than I have needed, as part of a single subscription, and it means there are no personal email credentials stored on the Pi4. rsync is used for backups to my data centre server, cron runs the daily report scripts at scheduled times. All of these things are standard Linux packages. When I'm able to upgrade to the 2026 LTS release of Ubuntu, I'm hoping to use A/B boot, so that rebooting the Pi4 remotely will fallback to the B system if A fails to boot. There is plenty of space on the SSD for multiple Linux partitions. At the moment, I reboot the Pi4 only when I am on the boat, as a failed remote reboot means I lose remote monitoring until my next visit. This has happened once, and I don't want it to happen again. For this reason, I don't do Linux kernel updates remotely, as they require a reboot.
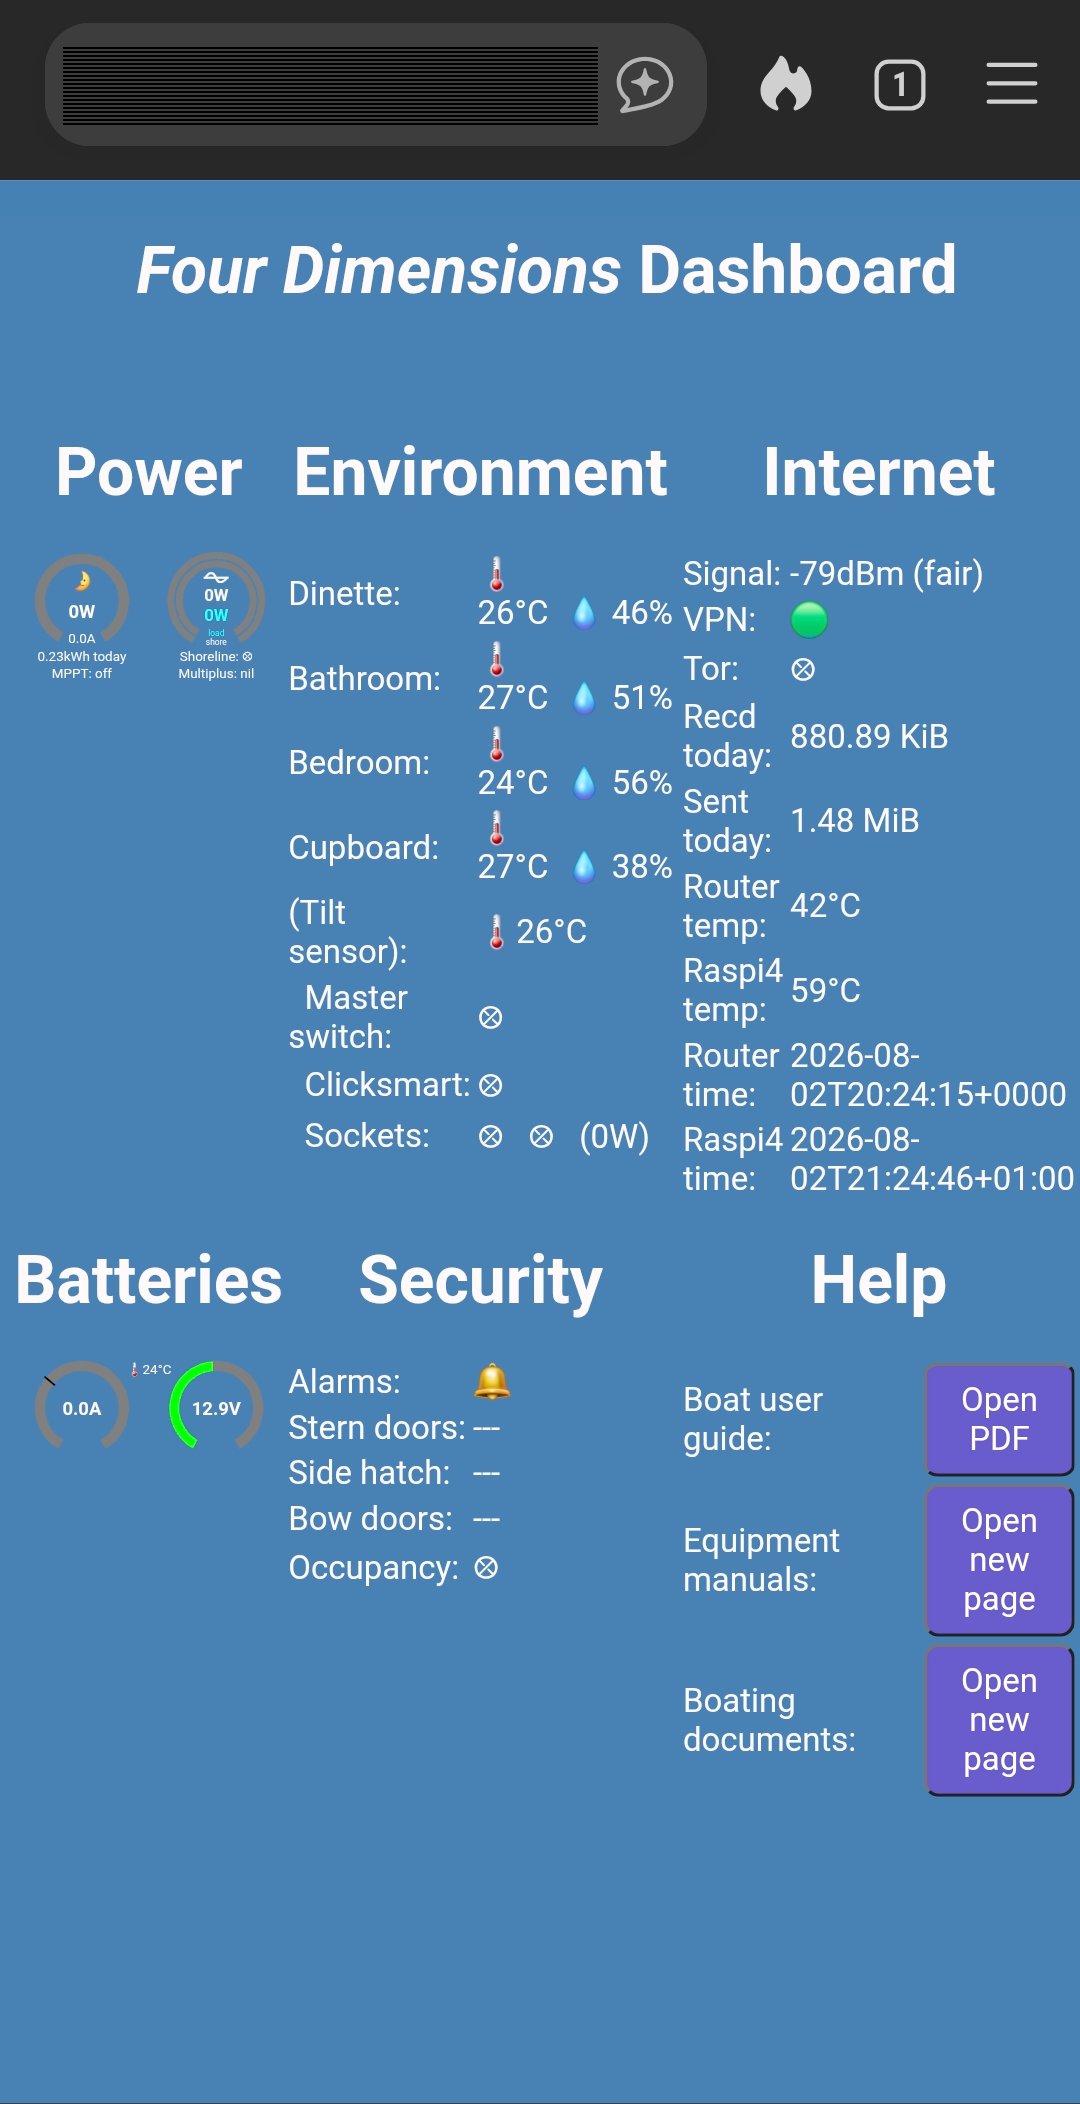
The Intranet dashboard is written in hand-coded HTML, with embedded Ruby (ERB), and Scalable Vector Graphics (SVG) for the power meters, all in one webpage/RHTML file with just under 400 lines of code including comments (much of this code is repetitive as you would expect from the dashboard screenshot). A small CSS stylesheet defines the grid layout in 6 <div> elements. I use the Webrick Ruby webserver, which makes the embedded Ruby easy. This means when the webserver serves the dashboard page, it passes the RHTML code through ERB, which runs the Ruby code snippets, and ERB replaces the Ruby code with the resulting HTML/SVG code. This result is then served to the web browser. Each time this is done, data is updated from the tmpfs filesystem to the latest available values. I developed this step-by-step, which is easy, as you can make small edits to the code and then see the result in the web browser, even if accessing remotely. The dashboard page updates every 15 seconds using a META refresh tag. Unicode characters are used to provide elements like the sun and moon in the solar meter, the thermometer and raindrop symbols in the environment section, the green light that shows the VPN is working, and so on, so in computer terms all these things are just text (not graphics). Only the circular power meters and voltmeter are graphics. Before creating this I looked at various dashboard libraries and concluded that all of them were too much trouble and not aligned with what I wanted which was simplicity above all else.
If you want to know more, do contact me (details on this blog-site's Contact page).